Adding and configuring a web resource in Paysto
To start accepting payments through Paysto, you need to add your web resource and successfully pass verification by our security service. A web resource refers to your website or online store hosted on a separate domain.
![]()
Important: Paysto does not directly connect Telegram bots, channels, or social media pages. For such purposes, you need to use a separate web application or a landing page on your own domain.
What to prepare before adding a resource
Before proceeding with adding a web resource, make sure the following conditions are met:
- You have successfully completed registration.
- Your owner Profile is fully filled out and saved.
- You have access to manage your domain's DNS records (login/password for the domain registrar) to add a TXT record. Learn more about domain ownership verification.
- Your web resource complies with Paysto requirements and does not contain prohibited goods and services.
![]()
You will not be able to connect a resource if you do not have access rights to manage the domain's DNS records.
Step 1: Filling out the web resource questionnaire
Log in to your Paysto Personal Account and click the
Connect Storebutton:
A questionnaire for web resource registration will open. Fill in all required fields:
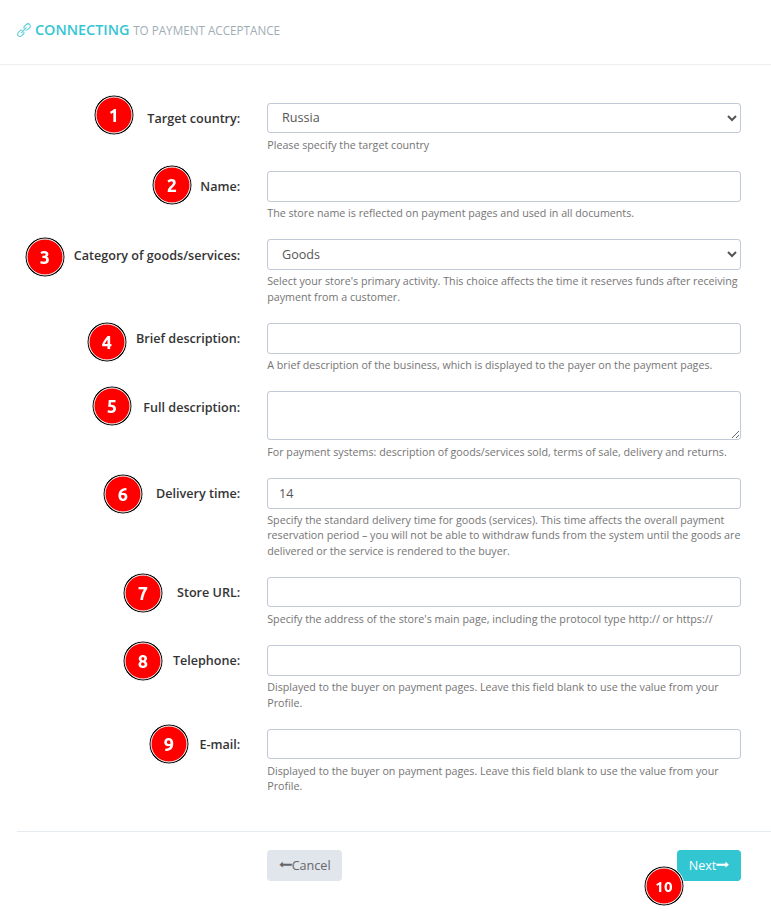
Questionnaire field values
Target country: Specify the country where you need infrastructure for sales. Currently, only Russia is available.Name: The brand name of your project or brand. ⚠️ Maximum length — 18 characters.Category of goods/services: Choose the predominant category of your activity (Physical goods, Digital products, Services).Brief description: Briefly describe your business (public information).Full description: Detailed description of your business (can repeat the value from the brief description, public information).Delivery time: Specify the average time to fulfill obligations to customers.Store URL: The full address of your web resource's main page, including the protocol (http:// or https://).Phone: (Optional). If the field is empty, the account owner's phone number will be displayed to payers. We recommend specifying a contact phone number responsible for order processing.E-mail: (Optional). If the field is empty, payers will see your email (account owner's address) as a contact. Also, if you plan to use a showroom, the manager's registration will be done using your email. We recommend specifying a separate email for communication with clients.
After filling out the questionnaire, click the
Nextbutton.
Step 2: Connection settings
On this page, you will configure your resource's connection parameters:
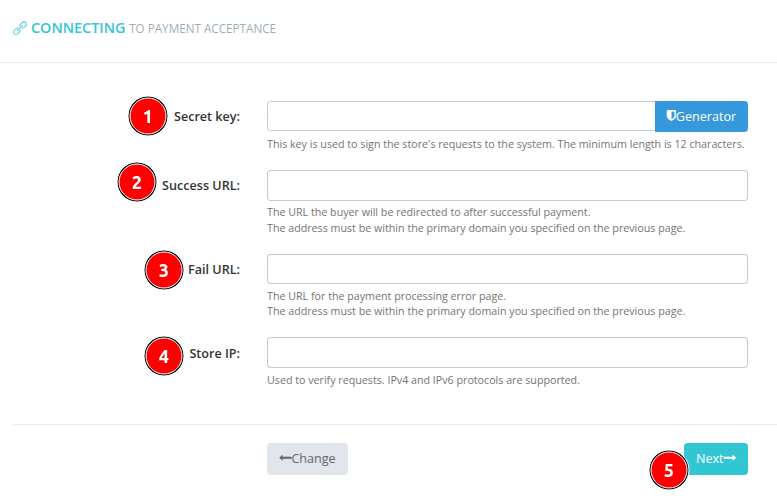
- Creating a signature for API requests: Specify a signature (API Key) for secure requests from your resource to Paysto servers. You can use the built-in
key generator.
You don't need to save the key separately — it will always be available in your Personal Account after the resource registration is complete.
- Success page address (Success URL): Specify the URL of the page on your resource where the payer will be redirected in case of successful payment.
If your online store has a payment status handler configured, this address can be the store's root page.
- Payment failure page address (Fail URL): Specify the URL of the page where the payer will be redirected in case of an error or payment refusal.
If your store has a payment status handler, this address may coincide with the success payment address.
- Your resource's IP address (Server IP): Specify the IP address of the server where your web resource is hosted.

Request Security: The Paysto system accepts requests only from authorized servers with the specified IP address. If you use a reverse-proxy, IP anonymizer, or other real IP address concealment, you must notify Paysto security service in advance. Otherwise, order processing and refunds will be suspended.
- After making all settings, click the
Nextbutton.
Step 3: Checking the entered data
A page for final verification of all entered data will open.
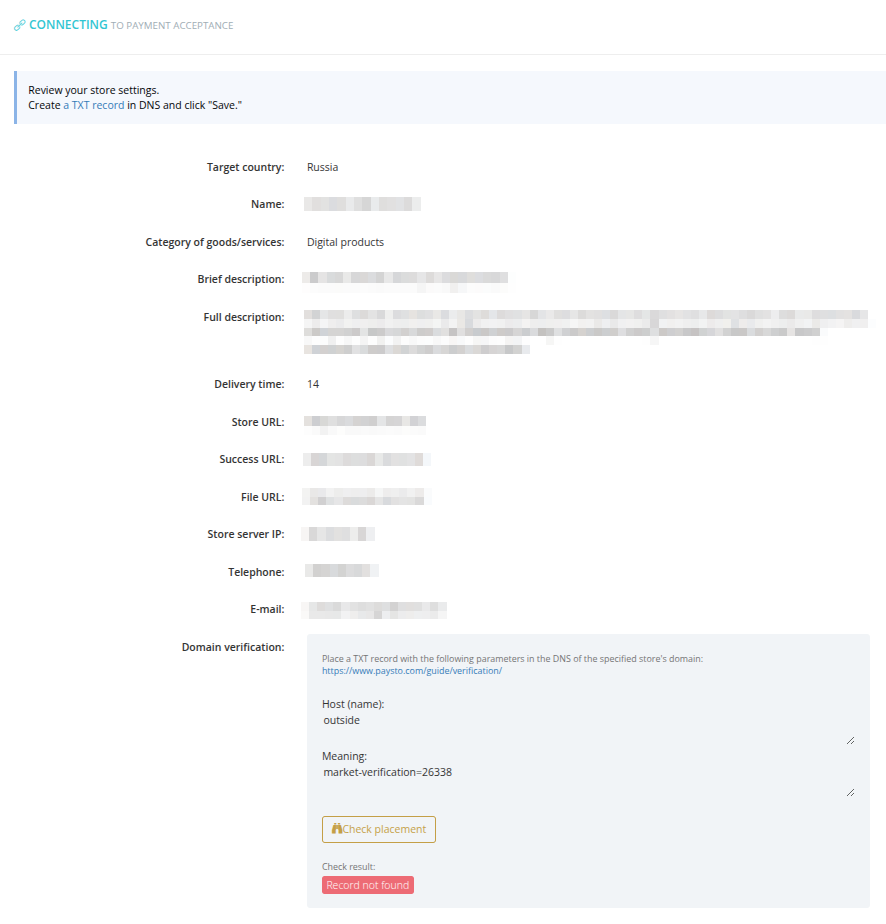
Carefully review the connection request information. If errors are found, click the Edit button to correct them.
Step 4: Domain owner verification
To verify domain ownership, follow the instructions in the "Domain Verification" block:
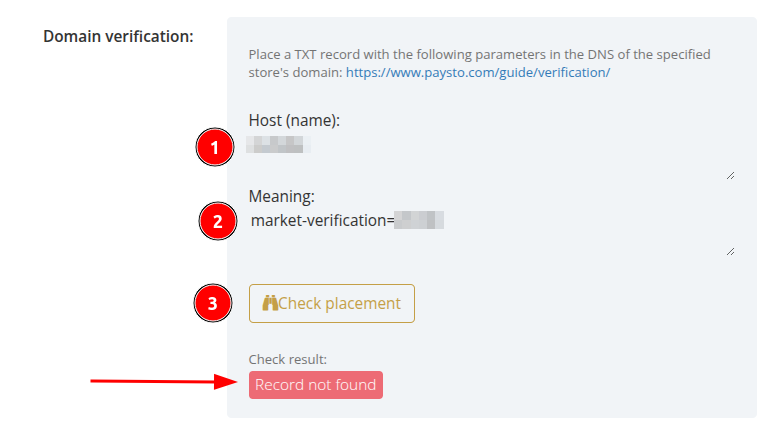
Using the
Host(1) andValue(2), place the corresponding TXT record in your domain's DNS records. Detailed instructions with examples will help you with this.After adding the TXT record, click the
Check placement(3) button.
The time it takes to verify DNS records depends on your domain registrar's settings and can range from a few seconds to several minutes.
As a result of successful verification, the status will change:
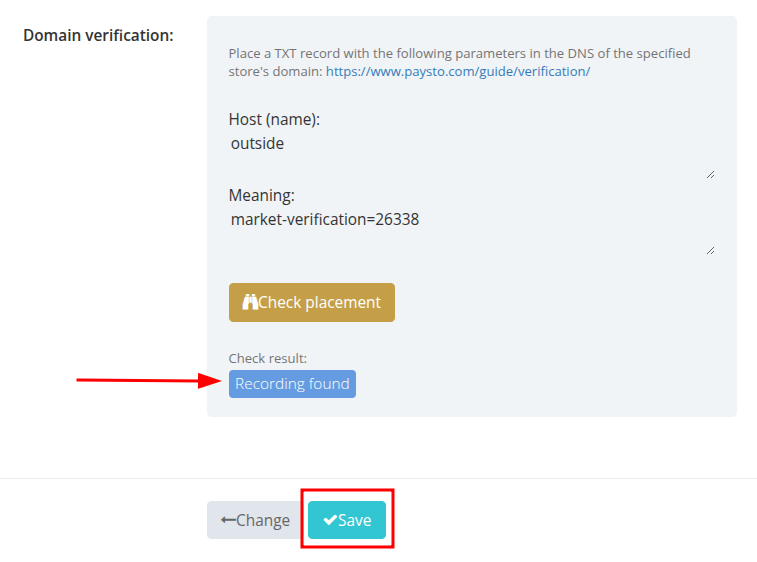
After successful verification, click the
Savebutton.
Completion: Resource Moderation
A page will open confirming that your resource has been sent for moderation:
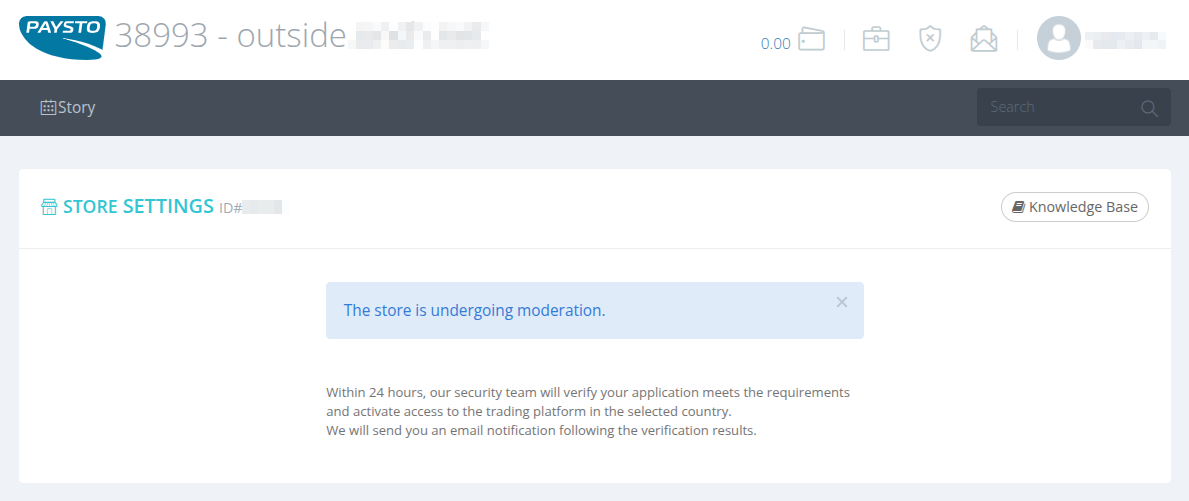
Paysto's security service will check your web resource for compliance with our requirements and connect the optimal infrastructure based on the specifics of your activity.
If you plan to integrate with a closed infrastructure or require the development of an individual solution, please contact Paysto support to discuss the details.